Cold Weather Gear for Handlers Part Two: Dryshod NOSHO Ultra Hunt Cold Conditions Hunting Boots1/15/2024 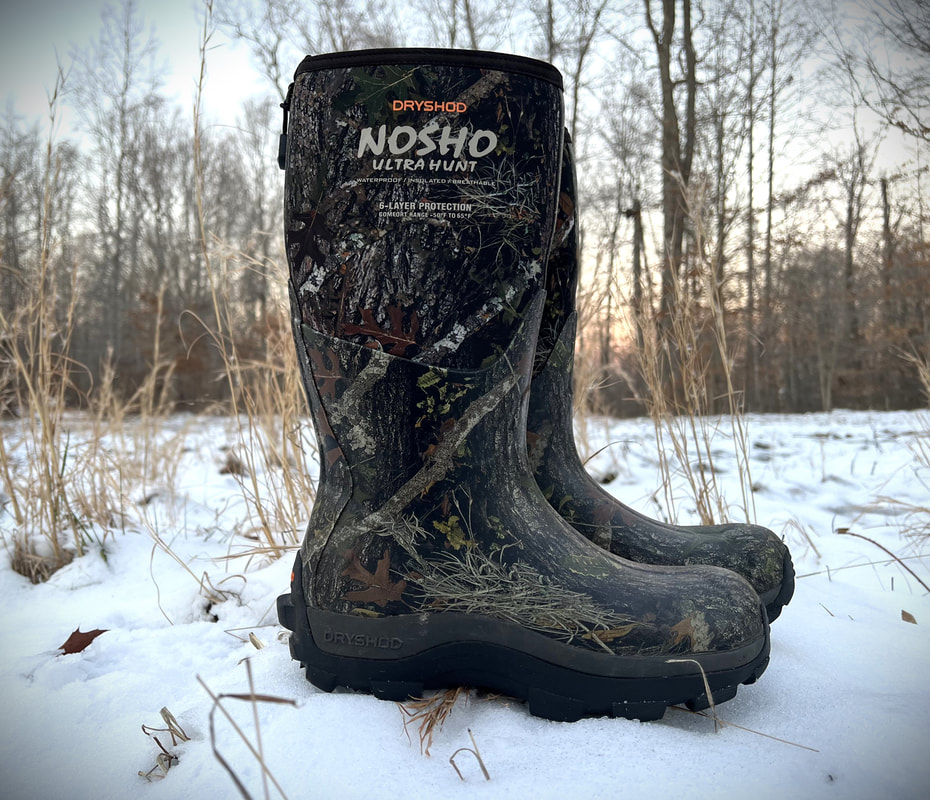 When it comes to hunting with my retrievers or training them in cold weather, tall insulated rubber boots are often more ideal than lace-up boots, as they offer protection from the wind and water. I have not always had good experiences finding the right pair of insulated rubber boots that fit properly, functioned as advertised, and were durable. Therefore, I have always preferred lace up boots. However, Dryshod’s NOSHO Ultra Hunt Cold-Conditions Hunting Boot changed that for me. They are the first pair of rubber boots that I have found to fit extremely well, function as advertised, and withstand the abuse that can come with waterfowl hunting and cold-weather retriever training. Cold-weather rubber boots that I have previously worn, even high-quality name brand boots, have been heavy, bulky, and slop around on my feet. Rather than focusing on my retriever, I feel that I must look at the ground often and take big, exaggerated steps to avoid tripping. However, I have been very impressed with the overall fit and feel of Dryshod’s NOSHO Ultra Hunt Cold Conditions Hunting Boots. They are not heavy, not bulky, and have an athletic feel. I feel in sync with the boot. Where I move, the boot moves too. This is due to the fact that they fit my feet properly and provide superior support as advertised. When walking on uneven terrain or hillsides, my ankles stay supported and upright. They also have a four-way stretch material that allows the boot to stretch and give as needed, which is perfect for walking on steep inclines, squatting down to catch an inbound pup, and stepping up on the side of the truck to grab gear. These attributes combined allow me to move with ease and focus more on handling my retrievers. The boot's traction provides the grip you need in the snow, on slick swamp bottoms, on steep inclines, and in muddy fields. The boots have a kickoff plate on the heel. It is large enough to help you pull off the boots, but not too large where the boots would be uncomfortable to drive in. The calf pipe can be rolled down to allow you to vent your boots as needed. Paired with the right socks (merino wool or merino wool blend socks), these boots will keep your feet warm and protected from the elements as advertised. The terrain and elements that I venture into with my retrievers can be trying, but Dryshod’s NOSHO Ultra Hunt Cold Conditions Hunting Boots keep my feet stable, protected, and comfortable. Given their durability, they will continue to do so for a long time. I did not realize the positive impact that these boots would make on my time afield with my retrievers. If you are looking for a quality boot to keep you warm and protected while hunting or training with your retriever, I recommend these boots. If you do not hunt or do not like camo, check out Dryshod’s other cold-condition boots. *Ladies, I have narrow feet and have not found a better rubber boot for my feet. I’ve spent quite a bit of money on quality boots that lasted for years, but just did not fit. Since they did not fit, they did not fully function as they were designed to. If you too have had a difficult time finding a pair of boots that fit your feet, consider these.
0 Comments
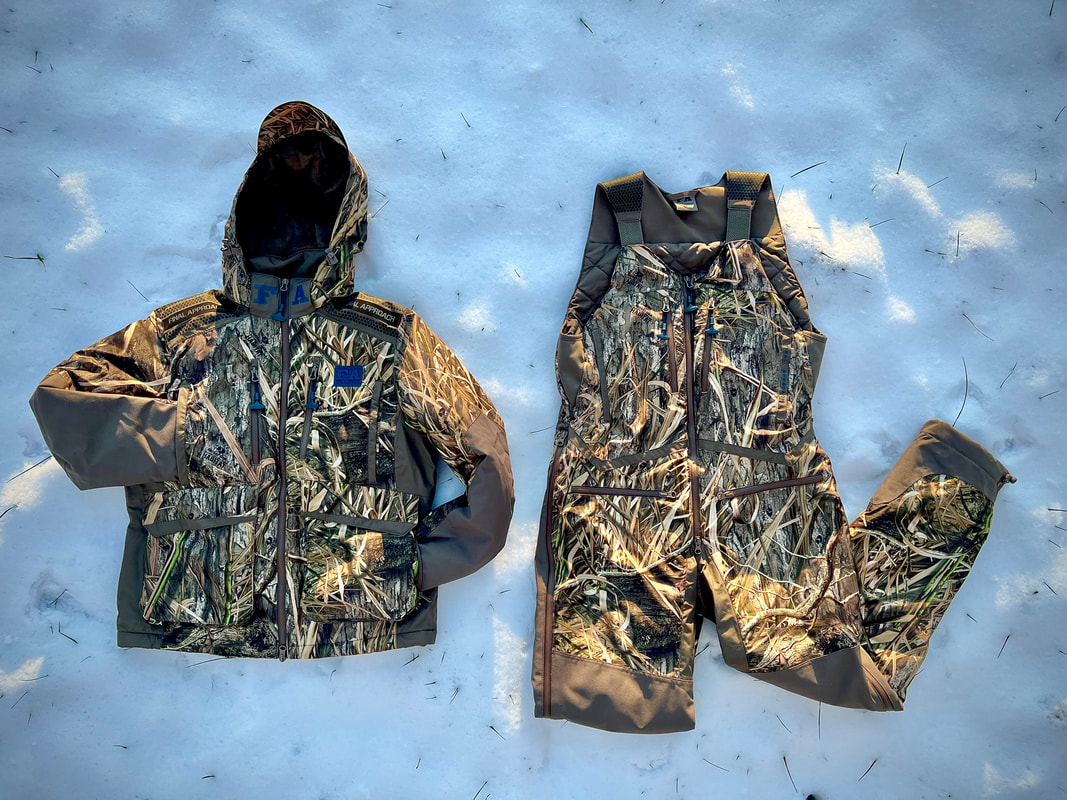 Having high quality apparel that is functional and durable to endure the brutal elements you face with your retriever will allow you to focus more on your retriever while afield and will allow you to enjoy the time you spend with them more. Whether you are a waterfowl hunter looking for the correct apparel for the waterfowl seasons to come or a retriever owner in need of apparel that will get you through your winter and early spring training days, consider Final Approach’s Branta Wader Jacket and Branta Bibs. Final Approach: Branta Wader Jacket This jacket’s 100grams of Primaloft silver insulation provides warmth that is not bulky. I found it to be very warm and even used to help warm up a very cold small- framed retriever who I thought may need to go back to the truck when hunting. Although it is a wader jacket, it works great for hunting and training on the water and in the field. The fit of the jacket offers enough room to layer as needed without allowing cold air to blow in when not wearing layers. The great fit of this jacket in combination with its limited bulk, means my gun does not snag on my jacket when shouldering it. This is essential whether you are in the blind hunting, or at the line training or competing. One can adjust the jacket to fit their unique shape utilizing the chorded waist, adjustable handcuffs, and chorded hood. The hood is fleece lined and has a built-in bill to help protect you from the elements. One adjustment that I would make is designing the hood to be deeper to accommodate woman’s ponytail or bun. Aside from this, the jacket is teeming with other practical features. The shoulders have a non-slip design to help prevent gear from sliding off your shoulders. This is perfect for carrying dog stands, bags of bumpers, guns, and other gear. Ladies, this is an ideal feature for our narrow shoulders. To add durability and protection, the arms and elbows on the jacket are reinforced. YKK AquaGuard zippers help keep you and your pocketed gear protected from the elements. Large zipper pull tabs make it easier to access your pockets with gloves on. The pockets on this jacket are well placed and include the following.
The two dump pockets are made for quick access to gear. This is ideal for shells when hunting and blanks or poppers when training. Aside from that, these pockets would be ideal for an e-collar transmitter, an extra e-collar receiver, a lead, a folding travel bowl, or a compact first aid kit. If you have a pup on your truck, the dump pockets accommodate a puppy bumper and are ideal for training treats. Final Approach: Branta Bibs Personally, I hate bibs! I do not like another layer of what feels like bulk, especially when trying to get out of a layout blind to handle a retriever or bend over to take a bird from a dog. I have been trying to make a pair of mid-season pants work when out hunting and training, which leaves me cold. However, the Branta Bibs have 100grams of Primaloft silver insulation that offers warmth without the bulk. Less bulk accompanied with flexible knees and crotch provides the range of motion needed in the field. Similar to the Branta Wader Jacket, the bibs offer enough room to layer, but not too much, which may allow cold air in. The ripstop fabric paired with reinforced knees, lower leg, and seat area creates the durability needed and is ready to take a beating. Aside from these attributes, these bibs are outfitted with YKK AquaGuard zippers and a few large pull tabs. The outer legs have zippers that go from your waist to the bottom of your ankle, which allows you to easily access pockets on your underlying pants. Similar to the Branta Wader Jacket, the bibs have a non-slip shoulder design too. The following pockets are found on the bibs.
The two upper leg pockets are deep enough to accommodate a variety of items. Examples include a phone, snack, lead, folding travel bowl, or an extra e-collar receiver. Overall, I am very impressed with Final Approach’s Branta Wader Jacket and Bibs. They are my new go-to pieces of cold-weather apparel. One unique feature found on both is the small pockets in the lower back. These are made with additional warmth in mind, as they accommodate disposable or rechargeable hand warmers perfectly. The Branta Bibs feature these small pockets within their hand warming pockets too.
Although the Branta Bibs and Branta Wader Jacket are made with hunters in mind, they work great for retriever training and would be ideal for winter training days, and any cold days you may face during early spring running hunt tests. *Ladies, the Women’s Branta Bibs and Wader Jacket have been the best fitting outdoor cold-weather apparel that I have owned. With that, they are durable and practical. I am glad Final Approach expanded their Branta series sizing to accommodate women. I look forward to seeing what women’s gear they launch in the future!  Many waterfowl hunters can appreciate the relationship another waterfowl hunter has with their retriever. However, it can be easy for hunters to get caught up in the excitement of the hunt or the banter that is occurring in the blind. During these moments, their etiquette when hunting with another hunter and their retriever may backslide. Consider the following to ensure your etiquette is up to par.
1.) Be aware of the dog’s location when shooting, especially if taking aim on low birds. Even the steadiest dogs may occasionally break on inbound birds. With that, ask the owner what their preference is when taking aim at inbound birds while their dog is out picking up previously downed birds. Many owners don’t mind if shots are taken on inbound birds as long as they are not low shots, but it is courteous to verify. 2.) Always listen to the owner’s instruction or honor their preference when it comes to hunting with their retriever. For example, if the owner is hesitant to send their retriever for a downed bird for safety reasons, do not pressure them to do so. If their retriever gets too cold or injured and the owner needs to leave, honor that and help them get out of the field as soon as possible, even if birds are flying. 3.) Similarly, listen to the owner’s preference when it comes to interacting with their retriever. For example, if they tell you that their young retriever is still unsure of others and to give the dog some space until later in the hunt, do not jokingly spook their dog or force the dog to be pet by you. While it may be all fun and games to you, this only makes the dog more unsure of other people. 4.) If you see or encounter things that could be hazardous to the retriever (sharp beaver stobs, sharp branches, ice, etc.), notify the owner. With that, it is not a bad idea to help the owner keep an eye on their retriever's well being, especially if elements are harsh. 5.) If your hunting partner works with their retriever in the off-season, it is likely that they have already worked on steadiness. You do not need to contribute with poor aim and a pile of empty shells. 6.) Let the owner work with their retriever without any sarcastic remarks about the way they handle their retriever or how their retriever may be performing. This is especially true when hunting with a young dog that is still getting hunting experience under their belt, as they may take longer to locate and retrieve downed birds. 7.) Be sensitive to the dog handler’s connection and time spent with their dog. If it is their last hunt with their dog, allot them time to have a special moment with them. 8.) Consider taking photos of hunters working with their dog afield. These photos are often cherished in the years to come by the owner. Pursuing waterfowl alongside a well-mannered and trained retriever truly makes a hunt. Consider ways you can help ensure that the retriever goes home healthy and safe by being aware of their location when shooting, listening to the owner’s instruction, and keeping an eye out for hazards in the field. Be respectful and courteous of another hunter’s relationship with their retriever. Feel free to share information such as the location of a downed bird, but keep sarcastic commentary to yourself. Take the opportunity to take pictures that will be cherished for years to come. Enjoy your hunts, and stay safe!  With Thanksgiving and Christmas right around the corner, chances are you may have family members (two-legged and four-legged) come and stay in your home. This may be exciting for some. However, others may find this difficult due to the differences they may have with the way their family member does things, especially regarding their dog(s). If you find yourself in the latter group of people, below are a few considerations to chew on when hosting that family member and their dog(s).
Try to go into hosting with a good attitude and be as welcoming as you can be. Walking around gritting your teeth while you stew on your differences, how things could go wrong between your dogs and your family member’s dogs, or how much you dislike your family member’s dog, will only create tension. With that, it leave you in a constant defensive state. If your family member will be staying for a while, it may be a welcoming gesture to have a couple of dog items on hand, so they can pack less and/or worry less. A few examples may include a bag of food, treats, or a couple new dog toys. This may not be easy or may be viewed as another chore to do before your family member’s arrival, but it will likely be a nice surprise for your family member and make them feel welcome, especially if you typically do not get along with your family member. During your family member's stay, it is important to know when to keep your tongue or when to speak your mind (respectfully). If you have rules (no pets on furniture, in the kitchen, etc.), share them. If you feel as if your family member is not treating your home or family with respect by allowing their dog to do as it pleases, speak up. If you are trying to mend a relationship or are trying to get along with your in-laws, avoid constantly comparing their dog to your dog in a negative way (looks, personality, training, manners, etc.). If you have a family member that is a worrier, it might be necessary to calm them down at times. For example, if your family member’s dog is frightened by a noise, and your family member becomes very anxious and tense about how scared their dog is. Consider stepping in and reassuring the family member that their dog is going to be alright. Otherwise, your family member’s upset state may be felt and absorbed by the dog. Depending on the dog, they may then remain scared longer or act out due to their owner's anxiety. If your dog(s) do not get along with your family member's dog(s), and you must keep them separate, avoid putting your dog on the back burner. Despite your hosting roles, spend time with your dogs. With that, if you are stressed by your hosting roles or are frustrated with your family member’s dog, recognize that you will likely be short of patience, and try to not take it out on your own dogs and family. Hosting some family members and their dogs can be hard at times. With determining where they will sleep or how your schedule may be altered due to their stay, consider ways to make things less tense in your home. However, in the end, if things will be too chaotic or stressful, do not be afraid to tell your family member that their dog(s) cannot accompany them, especially if the dogs are unruly, aggressive, or lack training. 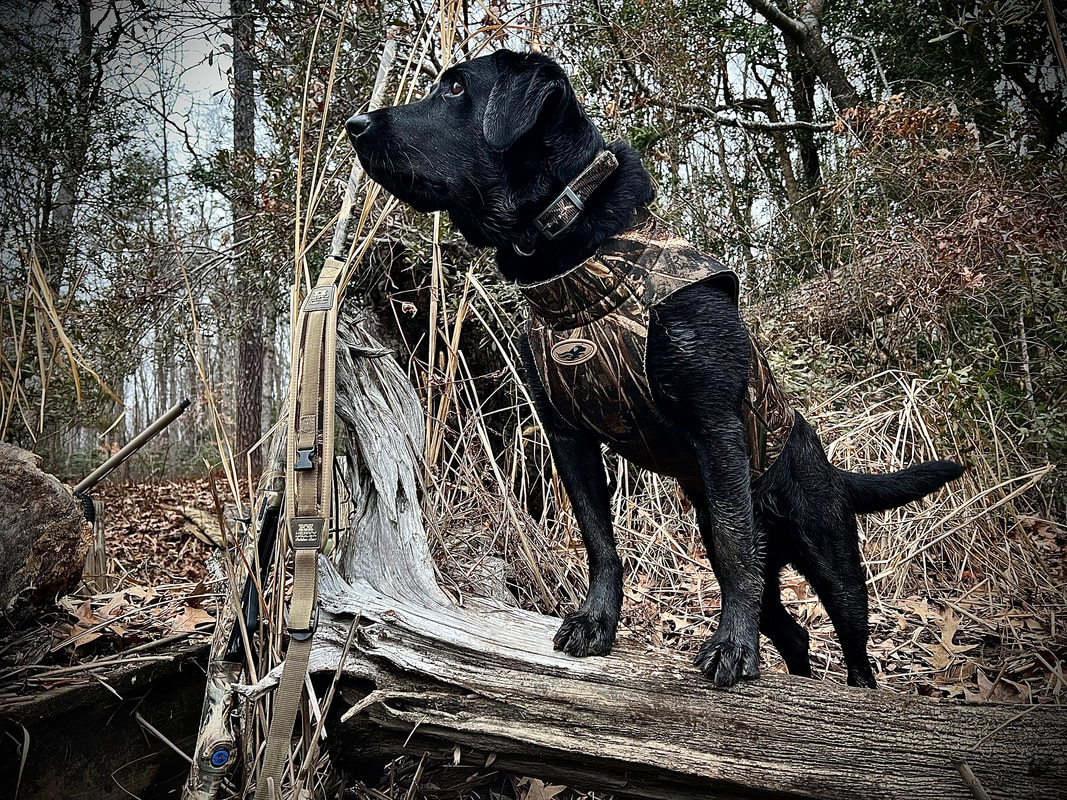 Everyone wants to come home from a hunt with their four-legged hunting companion safe and healthy. Aside from major safety concerns when afield with your retriever (gun safety, hypothermia, being aware of environmental hazards, post hunt health checks, etc.), there are other aspects to safety that are more likely to be overlooked.
Ensure Your Retriever’s Vest Fits Your retriever’s neoprene hunting vest helps protect your retriever against the elements, but it cannot carry out that job unless it fits your retriever properly. Vests that are too big and/or stretched out from another retriever's use, not only interfere with your retriever’s mobility, but can get snagged or hung on elements in the field such as tree limbs from fallen trees or logs. For retrievers that dive underwater in pursuit of a bird, this can be especially dangerous, as they can get hung on something underwater. If you are using a previous retriever’s stretched out vest, the vest may come part way off your retriever leaving your retriever bound up in the vest. Aside from this, vests that are too large can collect and trap debris between your dog and the vest. A vest that is too snug on your retriever may chafe their underarms and belly or constrict their ribs or belly leading to discomfort or pain. It may also interfere with their mobility on the hunt, which can cause injury. There are many vests on the market. When purchasing one, take the time to measure your dog and consult the size charts just as you would if you were shopping for yourself. Avoid, looking at your dog and thinking, "Well you look like a size medium." With that, understand that the vest of your choice may not fit your retriever perfectly. For this reason, some are designed with the option for owners to trim back the vest around the arms or neck to ensure a proper fit. Improper E-Collar Use E-collars should be properly fastened around your dog’s neck and be utilized properly. Many people fasten their e-collar too loosely, which creates an opportunity for your retriever to get hung on something when afield. This also allows for the e-collar to not make proper contact on the dog's neck, which means that the static stimulation given from the owner may not be received. Aside from this, some people do not consider that they may need to turn down their e-collar’s stimulation level if their dog is swimming in water or is wet. As a result, they apply too much pressure to the retriever, which can cause discomfort, confusion, and prolong the retrieve. If you have never used an e-collar, you should not let your first time be on a hunt. Your retriever should undergo proper collar conditioning, and you should have taken the time to be well versed in proper e-collar use. Enforce Steadiness Safely Some waterfowl hunters ensure that their retriever doesn’t break when shots are fired by tethering them to the duck blind or a nearby tree. If you choose to do this, allow your retriever just enough slack to stand up or lay down. Taking away any excess slack in the leash or rope should not allow them the opportunity to bolt and injure or break their neck. If your retriever will be on a stand hunting (off the ground or out of the water) and you choose to tether them as described, hunt next to them. If they should fall off the stand, you need to be there to prevent them from hanging themself. Feedings Before or During the Hunt You want your retriever to be fueled and hydrated for your hunt but consider how much you allow them to intake before or during the hunt. Providing normal or large feedings right before or during your hunt, may lead to your retriever becoming bloated and their stomach twisting on ends (gastric dilatation and volvulus). This can be life-threatening. It is important to discuss with your trusted veterinarian how much food and/or water your retriever should intake before or during a hunt. As you divulge into this waterfowl season, consider the ways to keep your hunting companion safe when afield. We cannot put them in a bubble, but there are actions we can take to ensure their safety. Sometimes that means using common sense. Other times it means thinking outside the box or calling on your veterinarian’s pearls of wisdom.  You researched until you found the perfect breed. You spent two years on a breeder’s waiting list. You’ve had many late nights and early mornings navigating potty training. You spent many hours throwing birds for your pup and learned quickly that your family didn’t appreciate the ducky cologne you wore post-training sessions. You laughed at your pup’s first attempt at swimming, only to learn how hard it would be to keep them out of the water now.
Needless to say, you and your pup have put in a lot of hard work to prepare for your first waterfowl season together. Before going full throttle this season, there are a few things you should do as a handler to set your retriever up for success this waterfowl season and the ones to come. Patience It is highly unlikely that your retriever is going to be a robot during their first season, let alone their first few hunts. While you may have put in a significant amount of effort into training, a real hunt is going to be different. A real hunt's variables are not controlled like the simulated hunting scenarios set up in training sessions. The more your young retriever hunts, the more experience they will gain and the more experience you will gain handling them. They will mess up, and you should correct them when they do, but be patient in your dealings with them. Pushing buttons on your e-collar’s transmitter when it is not called for, yanking the dog around, and constantly screaming at them is not only going to ruin the hunt. It will ruin your relationship with the dog and even the dog’s desire to hunt. Consistency The actions you permit your retriever to carry out on their first few hunts and during their first waterfowl season, will set the stage for how they will behave in the field for the seasons to come. Be consistent in enforcing commands, and do not waiver from your expectations and standards. For example, if you expect your retriever to remain steady, and they crawl or scoot forward before they are sent to retrieve a downed bird, replace them in their original position. If possible, make them wait for a few minutes before sending them for the bird. In some circumstances, it may be best for you or another dog to pick up the bird instead of your dog. Acknowledge Pitfalls We’ve discussed correcting your dog and being consistent, but you need to acknowledge your pitfalls and plan to correct them too. Everything that goes poorly while afield is not your retriever’s fault. Maybe you have unrealistic expectations for your young retriever and push them too hard. Maybe you lack the patience. Whatever your pitfall(s) are, do not shove them aside or work on them post-season. Instead, work on them right away. Depending on your pitfall(s), you may need to make changes outside of your relationship with your dog. One's pitfall(s) may not be limited to how they interact with their dog. Cherish Time In our fast-paced society, you must slow down and cherish the time you spend with your retriever. Spend less time scrolling through your social media feed while afield, and look at the companion in front of you. Laugh at your retriever’s antics and take a moment to love on them. Take photos of their accomplishments. Be “there" with your retriever. If you do, you will notice a positive difference in your relationship with them and both your performance and your retriever's performance. Be Safe Know your dog’s limits. No bird is worth pushing your dog to the point of exhaustion and possibly death. Avoid unnecessary vet visits or worse, by being aware of what hazards surround your dog in the field. A few examples may include beaver stobs, large sharp branches, and ice. If you are hunting with others, make sure they know how to safely hunt around a retriever. Have a few first aid essentials on hand in the field and a complex first aid kit in the truck. Always keep water on hand, as dogs can get dehydrated in the colder months too. Your retriever’s first season should be memorable. Be patient and consistent in the field. As you work on your retriever’s pitfalls, work on your own. Slow down and enjoy the time you are spending afield, as the seasons will go by too fast. Above all, keep safety first. To do that, avoid putting your retriever in situations that could end up deadly and be prepared.  There are many hours invested into turning a seven-week-old pup into a suitable family companion. It is a process. During this process, it is easy for dog owners to get into what many may refer to as a training slump. Despite knowing the steps to take to progress your dog’s training, training has hit a plateau. During these times, it is ideal to consider your mentality toward your dog’s training. Specifically, consider teamwork mentality.
Every dog trainer may have a different perspective on teamwork mentality. Having a background in working dogs, I view it as the difference between working your dog and working with your dog. The word, with, shifts our thought process from building our dog into what we desire to creating a team that understands each other and works together toward training goals. While I mentioned teamwork mentality from a working dog perspective, I feel it can be applied to all dog training. Before discussing a few teamwork mentality aspects, is important for owners to understand that a teamwork mentality does not say that you are equal to your dog. Every team needs a leader. A dog owner can and should be the team leader. One crucial aspect of having a teamwork mentality is that dog owners understand the good, the bad, and the ugly of their strengths and weaknesses as a person. The strengths and weaknesses you have do not just stay at the office or within your home. They often present themselves in almost all your relationships including the one you have with your dog. Therefore, your strengths and weaknesses impact how you interact with your dog and the success rate of meeting your dog’s training goals. With understanding one’s strengths and weaknesses, it is also important for owners to carry themselves in a way that will allow their dog to understand the dynamic of their relationship clearly. One example may include an owner displaying body language that shows they are the Alpha. In addition to understanding themselves, dog owners with a teamwork mentality take the time to understand their dogs. They do not treat them as a book on the shelf that they pick up only for training sessions, vet appointments, feeding, and watering. Specifically, owners understand or at least strive to understand how their dog communicates with them and how they should communicate with their dog. They also learn the pros and cons of their dog’s personality and acknowledge how their dog’s personality plays a role in their dog’s training. Owners should also understand their dogs to the point of being able to predict most of their actions. Understanding your dog does not happen overnight. Instead, it happens over time and begins when you first bring your dog into your home. Aside from these aspects of teamwork mentality, it is imperative that owners consider that their dog isn’t always to blame when things do not go right during training. In combination with that, owners must be willing to learn from their dog. You may not always leave a training session one step closer to meeting the goals you have for your dog. However, you may leave with a new perspective or lesson from your dog that can teach you how to be a better team leader. A few examples of lessons that our dogs may teach us include patience, the importance of consistency in training, and when to slow our pace when teaching new skills or commands. You can have all the items necessary to train your dog (the ideal property, collars, leashes, treats, etc.). With that, you may even have the right training plan for your dog and all the time in the world to work on it. However, if you do not have the right mentality towards your dog and their training, the bond you have with your dog will likely be weak and you will not accomplish the goals you have for your dog. Whether your mentality is the reason for your training slump or not, considering teamwork mentality may prove to be beneficial to not only your dog’s training but your relationship with them too.  During these warm months, many families enjoy taking their dog to local bodies of water to swim and play. When doing so, it is important to consider what environmental hazards could cause harm or injury to your dog(s). One hazard is cyanobacteria.
According to Dr. Hannah Bonner cyanobacteria, “are aquatic organisms that are closely related to bacteria and can photosynthesize like a plant. Sometimes the cyanobacteria in these blooms can produce toxins which cause illness and can damage the human kidney, liver, or neurologic system.” (2023) Toxins produced can cause illness in both humans and animals. According to the EPA (2022), “Cyanobacteria, formerly referred to as blue-green algae, are found naturally in lakes, rivers, ponds and other surface waters. When certain conditions exist, such as in warm water containing an abundance of nutrients, they can rapidly form harmful algal blooms (HABs).” There have been many cases of dog illnesses and deaths caused by toxins that cyanobacteria can produce. If you and your dog like to visit the water (even the water’s edge), I highly recommend that you take the time to learn more about cyanobacteria, how to identify it, and the symptoms that humans and animals may display after encountering it’s toxins, especially since it varies in color and form. In addition to learning about cyanobacteria, it would be wise to research other environmental hazards around or in the waters you visit. A cyanobacteria resource I recommend is the video, Learning To Identify Cyanobacteria Blooms, provided by the Interstate Technology and Regulatory Council’s Harmful Cyanobacteria Bloom Team. The following is a link to the video. https://www.youtube.com/watch?v=1Aknc7dZHMg. In addition, the following provides detailed educational information on cyanobacteria. Interstate Technology and Regulatory Council website
References Bonner, H. (2023). RESPONDING TO HARMFUL ALGAL BLOOMS- A 4 step process for private lakes & ponds. Reading. Retrieved May 29, 2023, from https://documents.deq.utah.gov/water-quality/standards-technical-services/harmful-algal-blooms/DWQ-2023-005373.pdf. EPA. (2022). Managing Cyanotoxins in Public Drinking Water Systems. Reading. Retrieved May 29, 2023, from https://www.epa.gov/ground-water-and-drinking-water/managing-cyanotoxins-public-drinking-water-systems 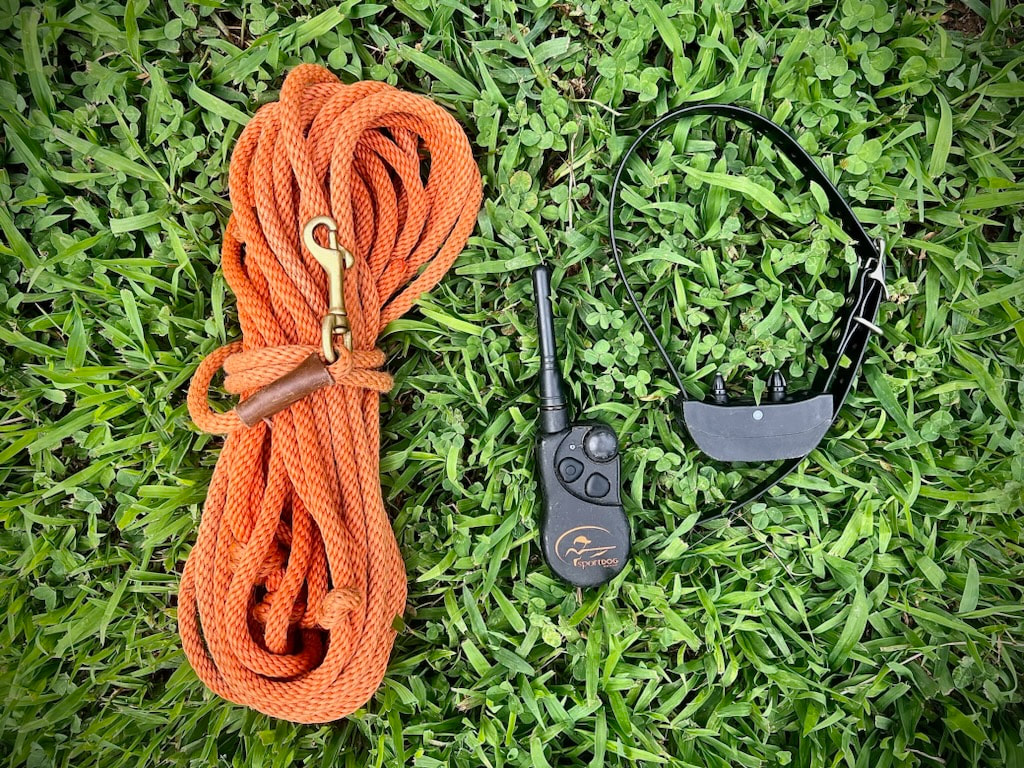  Properly conditioning your dog’s response to e-collar stimulation (collar conditioning) is a process. Bypassing proper collar conditioning can result with a dog whose spirit is broken, creating collar wise dog (one that only listens when a e-collar is on), and frustration. The following tips and steps may provide guidance to those who are interested in collar conditioning their dogs.
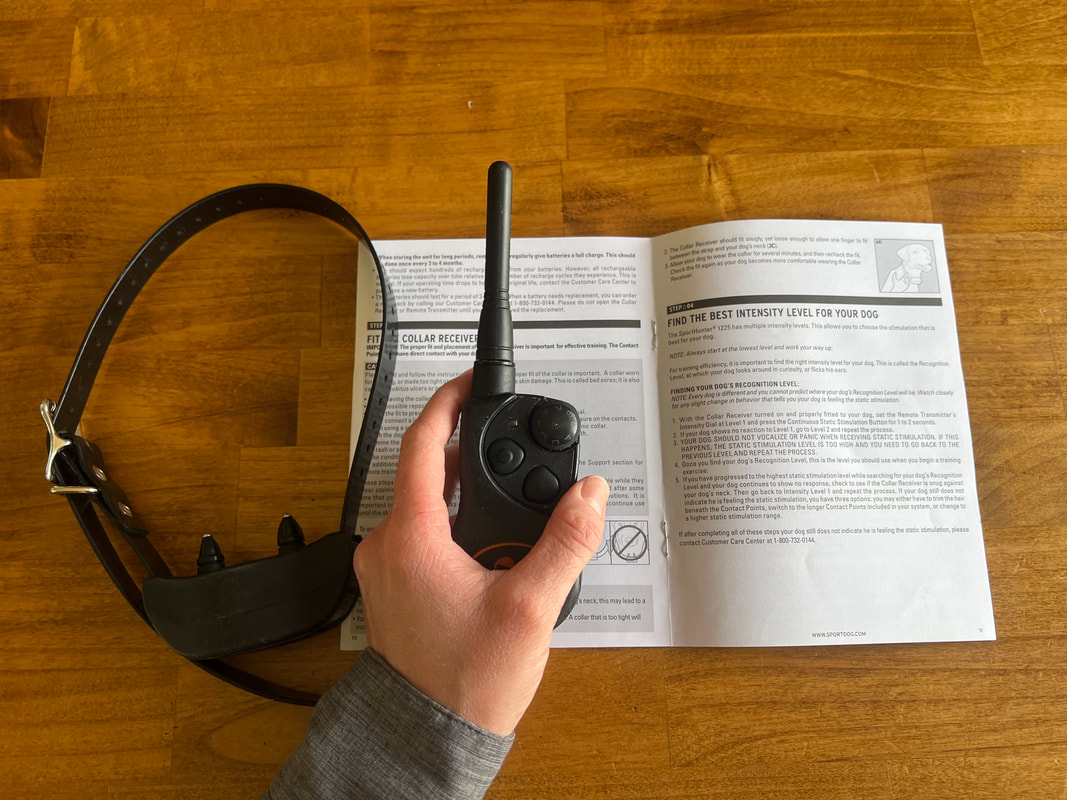
It is important to ensure your dog is ready to be collar conditioned. Do not start collar conditioning a dog until they are ready to begin formal basic obedience training. Many dog trainers use the age of approximately six months old. With that, recall from our discussion last month that e-collars are only to reinforce commands your dog already knows. They are not a teaching tool. With a dog ready to begin collar conditioning, begin by allowing your dog to wear an e-collar while taking part in fun or positive activities. These activities may include playing fetch, going for walks/runs, and even training sessions. Doing so will allow your dog to get acclimated to wearing the e-collar and help your dog associate the e-collar with something fun or positive. The latter aids in preventing a collar wise dog, that is, a dog that only behaves with an e-collar on or when the transmitter is in the owner’s hand. When taking this step with my dogs, I often get them excited to partake in the fun activity and show them the e-collar while doing so. When putting the e-collar on them, I turn it on, so they become accustomed to hearing the audible “BEEP” it makes. With that, I always keep the transmitter visible, as I also want them to associate the transmitter with something fun or positive. While every dog is different, if your dog is consistently excitable when they see the e-collar and the transmitter, that may indicate that you are ready to move forward in the collar conditioning process. Once your dog is used to wearing an e-collar and associates it with something good, it is time to begin reinforcing commands with it. Up until this point, especially if you have a young dog, it is likely that you have been conducting training sessions utilizing a leash to reinforce commands via pressure on, pressure off. This is good, as you will now begin reinforcing with both the leash and e-collar stimulation through pressure on, pressure off. If your dog does not understand reinforcement through leash pressure or has not had a training session on a leash for a while, take some time to utilize a leash to reinforce commands given to your dog before moving forward with e-collar reinforcement. * Recall from last month that pressure on is the applied pressure utilized to reinforce a command, and pressure off is relief from that pressure once that command is performed. As noted, you will begin applying e-collar stimulation by reinforcing commands with both the leash and the e-collar through pressure on, pressure off. For example, when working on the SIT command, command SIT, gently tug up on the leash and simultaneously provide short e-collar stimulation (a nick). This is pressure on. Relieve the pressure if the command is performed (pressure off) and praise. If the command is not performed, repeat those steps. Another example using the COME command, command COME, provide leash reinforcement by snapping the leash toward you and simultaneously provide a nick with the e-collar, relieve the pressure if the command is performed (pressure off), and praise. Moving forward from reinforcing with both a leash and e-collar, you may leave your dog’s leash on, but you will apply reinforcement with only the e-collar. Some people skip this step. However, if you are very fearful of having a collar wise dog, doing so may provide you with a sense of comfort. Following this, you will move forward with reinforcing commands with the e-collar (without the leash clipped on your dog). The length of time spent on each of these steps varies from dog to dog. Your dog needs to understand e-collar pressure, as they had to learn the leash’s pressure. Therefore, it is important to allot enough time for your dog to repeat each command and exhibit their understanding of e-collar pressure. If they seem confused, you need to take a step back. Prior to working through the collar conditioning process, owners must recall that they are only reinforcing commands through pressure on, pressure off as discussed last month. Furthermore, they should read through their e-collar manual to understand the guidance it may provide (cautions, e-collar stimulation level selection, collar conditioning steps, etc.). With that, owners must also ensure that their e-collar properly fits their dog. Steps in collar conditioning include:
 Many owners choose to utilize an electronic collar (e-collar) stimulation when training their dog. However, many owners do not know how to properly implement it. Failure to properly implement e-collar stimulation can result with a dog that only behaves when is wearing an e-collar or sees the transmitter (collar wise). If an owner applies too much pressure with e-collar stimulation a dog with little confidence or spirit may result. With that, they may act fearful to perform commands, especially if high pressure was applied at the wrong time.
If you plan on implementing e-collar stimulation, ensure you understand how to properly implement it. Dog owners and dog trainers who utilize e-collars properly take time to understand e-collars prior to utilizing them. Furthermore, they take time to learn the brand and model of e-collar they have. For example, they learn the simulation levels prior to using them, and start out on the lowest stimulation level. Some owners and trainers make rules of use for themselves and/or their families. One example may be, if you cannot handle the stimulation level, do not use it on the dog. It is widespread practice among those who utilize e-collars properly to use them ONLY to reinforce commands the dog knows. This is a crucial point, as many people try to teach their dog or get back at their dog for poor behavior through utilizing an e-collar. With that, proper e-collar users are self-controlled and do not take out their anger or frustration on their dog through the e-collar stimulation. Therefore, proper e-collar stimulation is used when necessary and at the proper time. You may be wondering what stimulation level is appropriate for your dog. Every dog and e-collar is different, and your user manual would likely provide guidance on how to select an appropriate stimulation level. Your manually will likely recommend that you start at the lowest setting and slowly work their way up. While doing so, observe your dog’s reactions from the e-collar stimulation. A dog will present a reaction if they can feel the stimulation level. Appropriate reactions from your dog may include their ears going back momentarily, blinking, slightly turning their head, or momentarily flinching. If you do not see any reaction at all (look closely), increase the stimulation level by one. If your dog’s reaction includes bolting, jumping around, a constant tucked tail, trembling, or anything over a flinching, your stimulation level is too high. Realistically, a dog may let out a yelp out of being surprised by the first nick, but they shouldn’t be crying out in pain or vocalizing with every nick. In conjunction with understanding e-collar reinforcement, the concept of pressure on, pressure off will aid in understanding e-collars. This is a widely understood concept, especially by those who utilize e-collars properly. Pressure on is applying a form pressure to reinforce or correct a command. Pressure off, is relieving pressure when the dog obeys. A simple example is pulling up on your dog’s collar or leash and gently pushing down on their rump (pressure on) to reinforce or correct their SIT command. As soon as your dog obeys, you relieve the pressure (pressure off). Another example would be a quick snap of your dog’s leash (pressure on) to correct or reinforce HEEL. As your dog immediately corrects itself into the proper HEEL position, the leash is loose again (pressure off). In this example, pressure on, pressure off occurs very quickly, as it is almost all one motion. However, you can see how pressure on, pressure off is applied. It is applied in the same manner with e-collar stimulation. E-collars can be a valuable training tool if implemented properly. A few major components of proper e-collar implementation includes understanding e-collars prior to using them (includes reading user manuals and instructions), using an e-collar only as a reinforcement tool through pressure on, pressure off, making rules of use for yourself and your family, and applying the correct e-collar stimulation when necessary and at the proper time. Note: If you are interested in purchasing an e-collar, I recommend looking into those offered by SportDOG. I have found them to be reliable and easy to use. |